 I’ve used a number of different password managers over the years. I was a LastPass user for a long time, but recently felt compelled to take a look at other options in this space. After a number of evaluations, I’ve settled on a new option: Bitwarden.
My two favorite parts about BitWarden: There is a self-host option, and the project is open source. There are a number of different open source implementations of various aspects of the project, which is awesome.
I decided to deploy my self-hosted Bitwarden deployment in AWS. My first decision to make was “how should I host this?”. Bitwarden is packaged as a docker container by default, so we have a few choices to run the image:
- ECS EC2
- ECS Fargate
- Self managed docker in EC2
Initially, I built out the environment in Fargate. That worked great. I more or less followed this build, which gets you started, but isn’t quite complete. For example, you need to make some decisions around persistent storage, etc. After running in Fargate, I decided the cost was too high for a single person to use as a password manager. For example, having a load balancer in front of a single container is not cost effective for one user. If I was hosting for an organization, I would probably go with this build.
 For a lower cost solution, I settled on this in the end:
- A single AWS EC2 T3.Small instance running Ubuntu. I installed Docker, Docker-Compose, and Bitwarden here.
- AWS Route 53 DNS
- LetsEncrypt SSL managed by Bitwarden scripts via Certbot.
- AWS SES for sending mail
So how do you do this for yourself? Its pretty straight forward:
- Provision an EC2 instance running the OS of your choice. Bitwarden has options for Windows or Linux. There are many guides on how to do this. Here is a good one.
- Minimum hardware requirements are single core, 2GB of RAM, and 10GB of drive space.
- For the security group, allow ports 443 and 80 for Bitwarden, and 22 for your own access via SSH.
- Provision an elastic IP to your new instance.
- Update your domain in Route 53 to point at your new elastic IP. We want this all setup before you install Bitwarden, because the install script will verify your domain via LetsEncrypt during the install process. The whole install will fail if your domain isn’t setup yet.
- Install Docker. Again, many guides on this. Here is a good one.
- Install Docker-Compose. Here is a good guide for that.
- Deploy Bitwarden via the nicely documented install guide located here. Pay attention to the section on editing environment variables. This is where you will configure your SMTP settings, which are required for account activation, admin access provisioning, and other features. I entered all of my AWS SES SMTP settings here, and am having Bitwarden send all its mail through that service.
- At this point, you have a functional server install. Bitwarden is running, but won’t automatically start on system boot, so you need to add it to system startup. There is a nice tutorial to do so on this page.
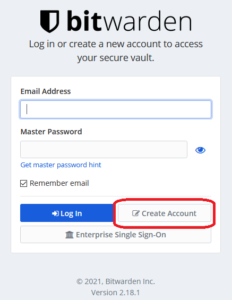
- Create a client account in your new self hosted environment by clicking create account on the login page at https://YourBitwardenURL.com, as shown below.

- Check out the admin area. Its at https://yourbitwardenurl.com/admin.
- Install your apps and addons. There are nice apps for IOS and Android, as well as browser plugins for all the major options.
- Configure your apps to connect to your instance. In the IOS/Android apps, there is a gear in the upper left hand corner. Click that gear, and enter the URL for your private instance, then login.
- Now that everything is up and running, I suggest configuring AWS Backup to take periodic snapshots of your instance. Its quick, easy, and inexpensive.
What is your favorite password manager these days? Any questions about this process? Let me know below.

Thanks for the guide! Just a heads up bitwarden now works at restart by default.
Thanks for the Guide. I’m looking to setup Bitwarden this way myself – can you identify the monthly cost involved running in AWS?
I’m using a T2.small instance, which is about $10 per month as of December 2023.
Thanks, this works well as a solution to self hosting.
The link to the Self-host Bitwarden option is not working anymore(link in point 1).
Also, have you documented the same guide for Windows as well? if yes, could you please share the doc?
Rick, great article!
What is your average monthly bill running it on AWS EC2 instance?