
 You want a Microsoft Windows 10 instance in your EC2 environment. Maybe its for a jump box, maybe its for direct access to some RDS instances or other services. Whatever the case, you went to AWS figuring you’d launch a new Windows 10 instance, and then you realized: Windows 10 isn’t one of the choices.
Its true, Windows 10 is not one of the pre-built AMIs offered by AWS. So how do you get yourself a Windows 10 instance running up there? Fear not! Thats what this guide is for. I’ll show you all the steps to get a Windows 10 machine running in AWS EC2.
NOTE: Windows 10 Home won’t work. Windows 10 Enterprise and Education editions work fine, but the home edition won’t import.
The basic process is:
- Build our Windows 10 image locally
- Setup our AWS account
- Create an S3 bucket
- Setup AWS CLI on our local workstation
- Setup some permissions in AWS
- Upload our Windows 10 image to AWS S3
- Convert our image into an AWS EC2 AMI
- We create an AWS EC2 image using our custom AMI
Time it: For a 15GB machine, this entire guide can take up to 4hrs to complete, depending on connection speed. Most of that time is waiting on an OS to install plus uploads and conversions.
I’m going to assume:
- You already have an AWS root account. If not, follow this guide.
- You already have Windows 10 install media and licensing – again, home edition won’t work.
You need to build your Windows 10 virtual machine locally. An easy way to do this is with Oracle VirtualBox. If you aren’t familiar with it, VirtualBox is a free desktop hypervisor you can use to run VMs locally on your workstation. I’d suggest building a Windows 10 VM off of your installation media inside of Virtual Box. While you do this, I recommend selecting VHD as your disk type. I will assume you are converting a VHD as we continue here.
Once the image is built, I recommend taking a few steps to prepare this virtual machine to be a sort of gold image for you up in AWS:
- Enable remote desktop! If you don’t do this, you won’t be able to get into your VM later.
- Make sure you put a password on your accounts. If there isn’t a password, you also won’t be able to enable RDP.
- Disable power saving settings.
- Apply all your Windows Updates while its still local so the image is as current as possible.
- Install any software you would want in your base image. Adding browsers, productivity software, or whatever you might need on it.
- I install the EC2 Configure Service. Think of this like VMware tools for AWS. Here is a guide to get that downloaded and installed. Its optional.
Step 2: Setup an AWS user for this process
Ok, so you already have an AWS root account. When you are running AWS CLI commands, you will typically use an access key id and secret access code instead of your usual username and password. What we’ll do below is create a new user for us to use to test these tasks, and take note of the access key id and secret access code, so we can use them later. This also follows best practices by not having you administer using your root account.
Note: You only need to do this the first time you perform this process.
In AWS, all user management stuff happens inside a service called “IAM”, so that’s what we will be working with below.
- Log into your AWS account
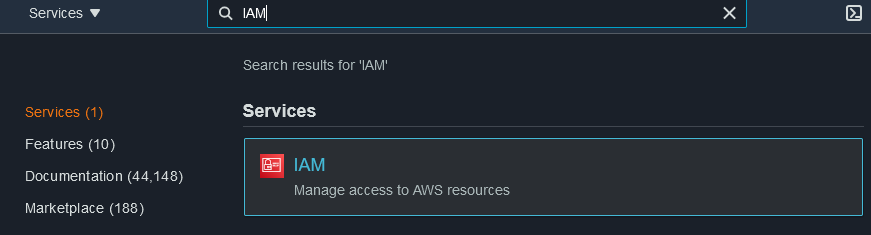
- Click into the search box at the top, and enter “IAM” as shown in the image below
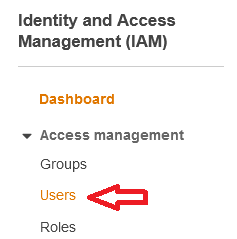
- Click “users” from the menu at left, as shown below.
- Click the big blue “add user” button at the top.

- Enter a user name, and then under that, only check “Programmatic access“. This user does not need console access, since you aren’t going to log into the web interface as this user.
- On the next screen, click “Attach existing policies directly”
- Select “AdministratorAccess” at the top of the list. It would be better NOT to use an admin account, but for the sake of simplicity, I’m going with the assumption that you’ll just use this user for this learning task, and then immediately delete the account for security. There are better tutorials out there for configuring with least privilege.
- Click “Next” through tags.
- Click “Create User” on the last page.
- Its going to provide you with the Access Key ID and Secret Key on the screen. It will also provide a link to a CSV so you can download those credentials. This is the last time you can ever get these credentials. There is no way to recover them later, so treat them accordingly.
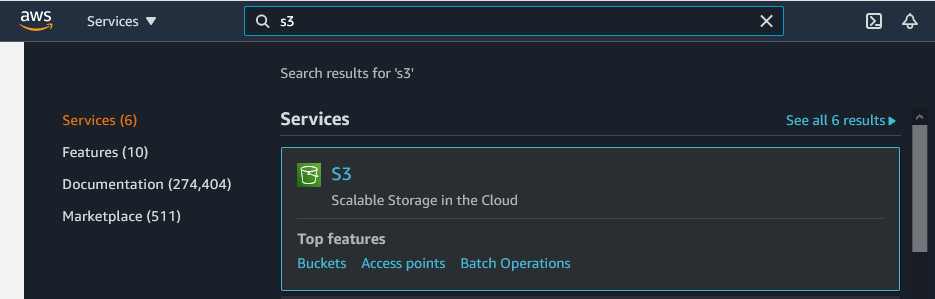
- Log into your AWS account.
- In the search box at the top of the dashboard, type “S3” and select the S3 service, as shown below
- All you have to do now is give your bucket a name, and accept all the defaults. S3 names have to be totally unique, can’t have uppercase letters, and have some other requirements. Don’t get frustrated by the fact that all the S3 names you want to use are already taken! Copy and paste your new bucket name somewhere handy.
- ** Note ** Selecting all the defaults, you are already protecting your bucket from public access. Don’t worry, nobody can’t put anything into this bucket except you. You are only charged for data that’s actually in the bucket. So, if you empty out this bucket after you are done, you won’t get any lingering charges for the empty bucket.
Step 4: Install and Configure the AWS CLI
Unfortunately, we really need to use the AWS CLI in order to do the import. I know we were hoping to get through this with minimal effort, but its also the best choice for copying files into S3 (which is the next step). We really can’t avoid it.
Note: You only need to do this the first time you perform this process.
- If you are on windows, download the AWS CLI here.
- Install it like anything else. If you want to read more about it click here.
- Open a command prompt and type: aws configure
- This will prompt you for the following, which you should have handy:
- Access Key ID
- Secret Key
- Default Region (this is the region you want all your stuff to be in by default. If you specify it here, you can leave it out of any commands that call for it)
- You are now ready to use AWS CLI. You can test it by typing this at a command prompt, the output should like the image below: aws –version

We need to create a role for the import process. We also need to give our role access to the S3 bucket we created earlier.
Note: You only need to do this the first time you perform this process.
First, lets setup the import role. This command takes a JSON config file as an input, so create the file as shown below. Edit it with your details, and put save it as policy.json into the same directory as your new Windows 10 VHD. Include all the brackets.
Now fire up that CMD window, and run the following command:
Next, we need to give access to our S3 bucket. This will allow the import process to write to our S3 bucket. This process also takes a json config file as an input. Copy this one below, and save it into our working directory as role.json. Make sure you edit the 2 occurences of ?YOURBUCKETNAMEHERE? with your actual bucket name. NOTE that one of them ends in /*. Make sure that survives, that is supposed to be there.
Then we run the command to use that config file. Fire up your CMD window and run this:
That is probably the worst step in the whole process. Don’t worry, it gets easier from here!
Step 6: Upload Your VM to AWS S3
We are now going to use the AWS CLI to copy our VirtualBox VHD into the S3 bucket we created earlier.
Open that CMD prompt, and get yourself into whatever directory has your VirtualBox VHD in it. Then, check out this command:
In that above example, change “myvmname.vhd” to the actual name of your VHD. Change “mybucketname” to the actual name of your bucket. Once you have that stuff correct, let it rip!
Ok, so now you are in for some waiting. It can take hours to upload a VHD image, or any large file for that matter, to AWS S3.
Once your copy is done, come back and move on to the next step.
Step 7: Create an Import Config File and Import the VM
Ah, you were thinking “sweet, my Windows 10 VM is now in AWS! Lets turn it on!” Not yet. First we need to convert the VHD into an AMI, which is the image format that AWS uses for virtual machines. They call them “instances”.
The tool that does this conversion reads in the parameters via a config file. I know its kind of a pain. I wouldn’t be typing this if it wasn’t absolutely necessary.
Here is a sample. Copy and paste this into notepad, then edit with your values. Save the file as “containers.json” and put it into the same directory as your VHD and the other config file we made earlier.
Now we need to actually import (convert) the VHD into AWS as an AMI. We will feed in the config file we created above to get the job done.
Fire up that CMD again, and enter this command, editing with your specifics
Once it is submitted, it will return JSON that looks like the image below. Note the active status and the message showing its pending: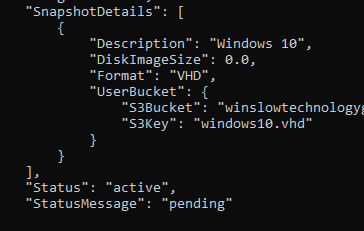
This takes a while. It will be faster than the upload to S3, but you are still looking at some waiting time. Expect this to look something like 30GB/hr. I did a vanilla Windows 10 VM today and it took about 30 minutes. Larger VMs will take longer.
This is actually happening in AWS, not on your PC. If you want to check on the status, you can always issue this command:
You are looking for this to return a status of “complete”. You’ll see several steps along the way such as pending, converting, and preparing AMI.
Step 8: Create an EC2 Instance from your AMI
Now we have to actually create an EC2 instance (aka a VM) from the VHD you uploaded, which has now been converted into an AMI.
- Load up that AWS Web UI (console) again. In that top search box that we’ve been using, type EC2 and load up the EC2 dashboard.
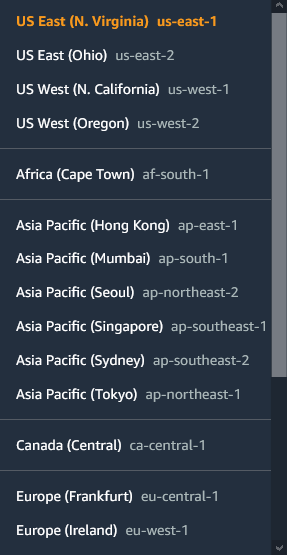
- Make sure you are in the instance that you have been using all along, probably the one you configured into your AWS CLI earlier. This is the most common cause of issues where you can’t find your AMI in the list!! AMIs exist in ONE region. So if you connect to a different region, you won’t see yours. You check this by looking to the top right of the screen. You’ll see a drop-down that shows a geographic location. Click on this and select the region you want. It looks like this:
 And when you click it, it opens up into this:
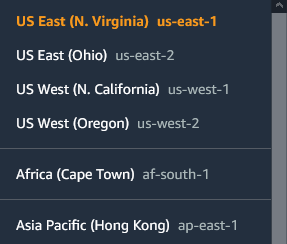
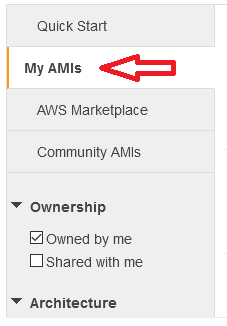
- Once the region is selected correctly. Click the big “Launch Instance” button.
- In the menu at left, click on “My AMIs” as shown below.
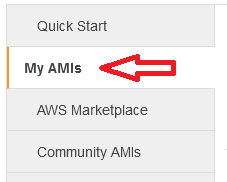
- This will show all your custom AMIs. The one just uploaded will look something like this:

- From here on, the process is the same as anyone else creating an EC2 image from scratch. Selecting the instance type, and specifying networking rules. A million people have written guides on this, so I’ll skip it. Here is a good guide with this part of the process: https://docs.aws.amazon.com/AWSEC2/latest/WindowsGuide/launching-instance.html
- Once you’ve run through the rest of that wizard, you can launch your instance at the end. It will take a few minutes to boot up and hopefully you don’t run into any compatibility issues.

At this point, you are hopefully running a shiny new Windows 10 EC2 instance! Be proud!
If this guide was helpful for you, or if you have any comments or suggestions, please let me know below.
![]()
This article was superb, just a couple of comments.
The containers.json code block has the wrong quote types. They’re curly.
I made my VM in VMWare Fusion. By default, it makes a UEFI version. I have to make a BIOS version manually. I then exported it as a OVA
I had some issues getting the right path to work on my Mac. The format was like this
file:///Users/user/Desktop/AMI/containers.json
It need 3 slashes at the start.
Fantastic article. Thanks so much.
A huge thank you Rick. Worked perfectly for me also. You saved me many hours, possibly days, digging through multiple sites and instructions on how to perform this end to end.
Hi!
Thanks for this very comprehensive guide.
Will this procedure allow you to run the instance on a non dedicated host?
Yes, you can use any of the regular shared instance types for this. I think I did it with something in the T2 class of instances. The specific instance type you choose would depend on what you want to do with the VM and what you need from a performance perspective.
Great article. It is going to be handy.
I have a comment regarding Step 1: Prepare your OS.
In VirtualBox (VB). The option I have in Virtual box is OVA. Is that what you uploaded into S3 bucket? Can OVA be converted to AMI on AWS?
Thanks again
Just confirming OVA also worked. Just one need to change the format here :
[{
“Description”: “Windows 10”,
“Format”: “ova”,
“UserBucket”: {
“S3Bucket”: “put-your-bucket-name-here”,
“S3Key”: “put-your-ova-filename-here”
}
}]
This is great! I had used it for Windows 10 and now trying Windows 11. It is failing during the conversion trying to boot. I have DHCP set for the network and not sure where to look to troubleshoot the exact issue of why it fails to boot during the conversion.
Another tip when preparing the OS: make sure your account does not have an expiring password! When I try to RDP to my instance I now get a “your password has expired and it must be changed” prompt, but it won’t let me do that over RDP so I have no way to change it and no way to log in!
I would love to try this. Where are folks getting their Windows 10 install media?
This has been great. I was able to follow the instruction until step 7. I am receiving the following error, any help would be appreciated.
Error parsing parameter ‘–disk-containers’: Unable to load paramfile (containers.json), text contents could not be decoded. If this is a binary file, please use the fileb:// prefix instead of the file:// prefix.
I have the same issue exactly. Were you able to find a solution?
I found a solution that worked for me. When copying and pasting the containers.json above I notice that it uses open and close double quotes. Try the below which should be just straight double quotes. When I used this format the command was accepted and processed.
The following should be with straight double quotes:
[{
“Description”: “Windows 10”,
“Format”: “vhd”,
“UserBucket”: {
“S3Bucket”: “put-your-bucket-name-here”,
“S3Key”: “put-your-vhd-filename-here”
}
}]
Separately I read somewhere else to add –license-type BYOD (since one is uploading an already licensed windows image). I am not certain if this is required but I did not want AWS to add an hourly windows license fee on top as the license I have is already paid for once.
aws ec2 import-image –description “Windows 10” –license-type BYOL –disk-containers “file://containers.json”
Do you know if it works with Win 10 Pro edition?