
![]() You want to move a VM into AWS EC2 with as little knowledge as possible, right? You don’t care to become an expert in AWS, you just want enough to get the job done. Here is what you have to do, how to do it, and how long it will take.
You want to move a VM into AWS EC2 with as little knowledge as possible, right? You don’t care to become an expert in AWS, you just want enough to get the job done. Here is what you have to do, how to do it, and how long it will take.
Time it: For a 15GB VM, this entire guide can take up to 4hrs to complete, depending on connection speed and VM size. Most of that time is waiting on uploads and conversions.
I’m going to assume:
- You already have an AWS root account. If not, follow this guide
- You already have a virtual machine and are running VMware, and have the appropriate rights in that environment to get your VM.
Step 0: Setup a user for this process
Ok, so you already have an AWS root account. When you are running AWS CLI commands, you will typically use an access key id and secret access code instead of your usual username and password. What we’ll do below is create a new user for us to use to test these tasks, and take note of the access key id and secret access code, so we can use them later. This also follows best practices by not having you administer using your root account.
Note: You only need to do this the first time you perform this process.
In AWS, all user management stuff happens inside a service called “IAM”, so that’s what we will be working with below.
- Log into your AWS account
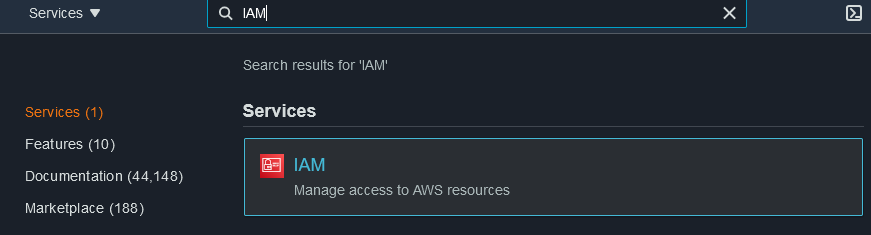
- Click into the search box at the top, and enter “IAM” as shown in the image below
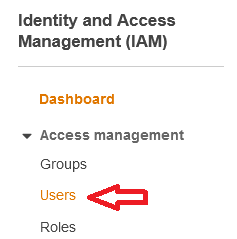
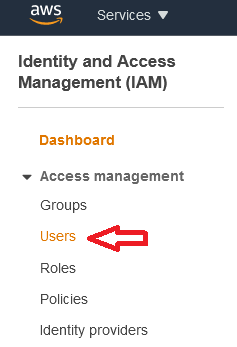
- Click “users” from the menu at left, as shown below.
- Click the big blue “add user” button at the top.

- Enter a user name, and then under that, only check “Programmatic access“. This user does not need console access, since you aren’t going to log into the web interface as this user.
- On the next screen, click “Attach existing policies directly”
- Select “AdministratorAccess” at the top of the list. It would be better NOT to use an admin account, but for the sake of simplicity, I’m going with the assumption that you’ll just use this user for this learning task, and then immediately delete the account for security. There are better tutorials out there for configuring with least privilege.
- Click “Next” through tags.
- Click “Create User” on the last page.
- Its going to provide you with the Access Key ID and Secret Key on the screen. It will also provide a link to a CSV so you can download those credentials. This is the last time you can ever get these credentials. There is no way to recover them later, so treat them accordingly.
Step 1: Prepare your VM.
Optional: I typically apply any updates I’ve been meaning to do before I export the VM. I also usually install the EC2 configure agent. Think of this like VMware tools for EC2. Read more about it here. Install it onto your VM if you want, before you shut it down.
Coming from VMware, we probably want to start with our guest as an OVA. This way if you have multiple VMDKs, they all get packaged up for a single conversion. The AWS importer supports VMDK files directly, but by packaging into an OVA, you’ll get everything you need. If you don’t know how to create an OVA already, you can follow this guide.
Step 2: Create an S3 bucket.
- Log into your AWS account.
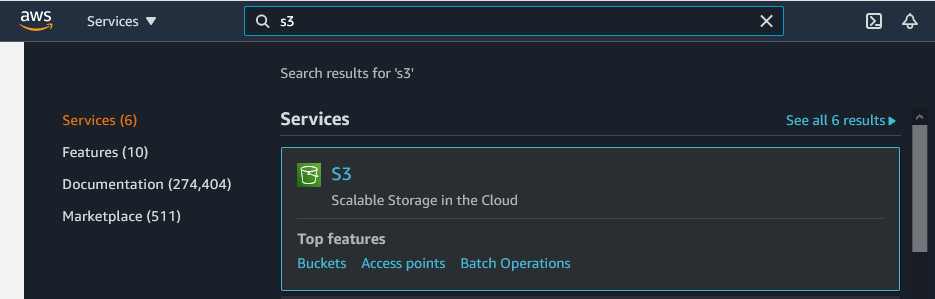
- In the search box at the top of the dashboard, type “S3” and select the S3 service, as shown below
- All you have to do now is give your bucket a name, and accept all the defaults. S3 names have to be totally unique, can’t have uppercase letters, and have some other requirements. Don’t get frustrated by the fact that all the S3 names you want to use are already taken! Copy and paste your new bucket name somewhere handy.
- ** Note ** Selecting all the defaults, you are already protecting your bucket from public access. Don’t worry, nobody can’t put anything into this bucket except you. You are only charged for data that’s actually in the bucket. So, if you empty out this bucket after you are done, you won’t get any lingering charges for the empty bucket.
Step 3: Install and Configure the AWS CLI
Unfortunately, we really need to use the AWS CLI in order to do the import. I know we were hoping to get through this with minimal effort, but its also the best choice for copying files into S3 (which is the next step). We really can’t avoid it.
- If you are on windows, download the AWS CLI here.
- Install it like anything else. If you want to read more about it click here.
- Open a command prompt and type: aws configure
- This will prompt you for the following, which you should have handy:
- Access Key ID
- Secret Key
- Default Region (this is the region you want all your stuff to be in by default. If you specify it here, you can leave it out of any commands that call for it)
- You are now ready to use AWS CLI. You can test it by typing this at a command prompt, the output should like the image below: aws –version

Step 4: Permissions
We need to create a role for the import process. We also need to give our role access to the S3 bucket we created earlier.
First, lets setup the import role. This command takes a JSON config file as an input, so create the file as shown below. Edit it with your details, and put save it as policy.json into the same directory as your OVA. Include all the brackets.
Now fire up that CMD window, and run the following command:
Next, we need to give access to our S3 bucket. This will allow the import process to write to our S3 bucket. This process also takes a json config file as an input. Copy this one below, and save it into our working directory as role.json. Make sure you edit the 2 occurences of ?YOURBUCKETNAMEHERE? with your actual bucket name. NOTE that one of them ends in /*. Make sure that survives, that is supposed to be there.
Then we run the command to use that config file. Fire up your CMD window and run this:
That is probably the worst step in the whole process. Don’t worry, it gets easier from here!
Step 5: Copy Your VM to AWS S3
We are now going to use the AWS CLI to copy our VM OVA into the S3 bucket we created earlier.
Open that CMD prompt, and get yourself into whatever directory has your VMware OVA in it. Then, check out this command:
In that above example, change “myvmname.ova” to the actual name of your OVA. Change “mybucketname” to the actual name of your bucket. Once you have that stuff correct, let it rip!
Ok, so now you are in for some waiting. It can take hours to upload a VM image, or any large file for that matter, to AWS S3. The VM has to be down the entire time. There are some things we can do to optimize these transfers, but at the end of the day, you need to get this data up to AWS, and that will take time. If you wouldn’t mind sharing what kind of upload speeds you got, we’d all love the datapoints. Comment below with your VM size, connectivity, and how long it took to upload your VM!!
If you are going to be doing lots of these, and don’t want tons of downtime, you probably shouldn’t be using this guide. Check out CloudEndure instead.
Once your copy is done, come back and move on to step 5.
Step 6: Create an Import Config File
Ah, you were thinking “sweet, my VM is now in AWS! Lets turn it on!” Not yet. First we need to convert the OVA into an AMI, which is the image format that AWS uses for VMs.
The tool that does this conversion reads in the parameters via a config file. I know. I wouldn’t be typing this if it wasn’t absolutely necessary.
Here is a sample. Copy and paste this into notepad, then edit with your values. Save the file as “containers.json” and put it into the same directory as your OVA.
Step 7: Import the VM
Now we need to actually import (convert) the OVA into AWS as an AMI. We will feed in the config file we created above to get the job done.
Fire up that CMD again, and enter this command, editing with your specifics
Once it is submitted, it will return JSON that looks like the image below. Note the active status and the message showing its pending: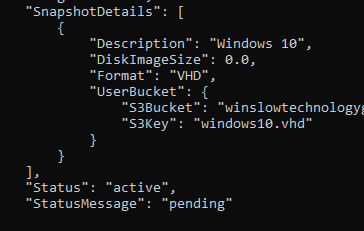
This takes a while. It will be faster than the upload to S3, but you are still looking at some waiting time depending on the size of your VM. Expect this to look something like 30GB/hr. I did a 16GB VM today and it took about 31 minutes. Larger VMs will take longer.
This is actually happening in AWS, not on your PC. If you want to check on the status, you can always issue this command:
You are looking for this to return a status of “complete”. You’ll see several steps along the way such as pending, converting, and preparing AMI.
Step 7: Create an EC2 Instance from your AMI
Now we have to actually create an EC2 instance (aka a VM) from the OVA you uploaded.
- Load up that AWS Web UI (console) again. In that top search box that we’ve been using, type EC2 and load up the EC2 dashboard.
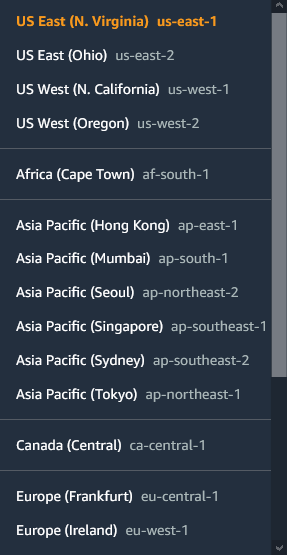
- Make sure you are in the instance that you have been using all along, probably the one you configured into your AWS CLI earlier. This is the most common cause of issues where you can’t find your AMI in the list!! AMIs exist in ONE region. So if you connect to a different region, you won’t see yours. You check this by looking to the top right of the screen. You’ll see a dropdown that shows a geographic location. Click on this and select the region you want. It looks like this:
 And when you click it, it opens up into this:
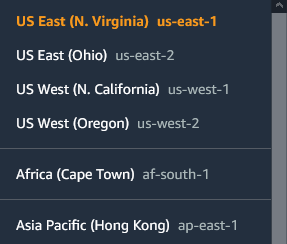
- Once the region is selected correctly. Click the big “Launch Instance” button.
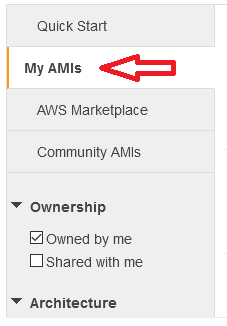
- In the menu at left, click on “My AMIs” as shown below.
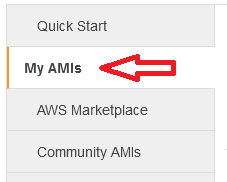
- This will show all your custom AMIs. The one just uploaded will look something like this:

- From here on, the process is the same as anyone else creating an EC2 image from scratch. Selecting the instance type, and specifying networking rules. A million people have written guides on this, so I’ll skip it. Here is a good guide with this part of the process: https://docs.aws.amazon.com/AWSEC2/latest/WindowsGuide/launching-instance.html
- Once you’ve run through the rest of that wizard, you can launch your instance at the end. It will take a few minutes to boot up and hopefully you don’t run into any compatibility issues.

At this point, you are hopefully running your old VM as a shiny new EC2 instance. But that is all wehave done! There is a lot more to do if you are migrating a production environment, for example:
- How is the networking configured? How are we routing? What is accessible to the internet?
- How am I backing this up?
- How resilient am I right now? What can I survive the loss of?
- What is all this costing me?
- How am I monitoring/alerting on all this?
Perhaps we’ll check off some of those boxes in future articles. For now, let me know your thoughts, comments, and suggestions in the comments below.
![]()
Hi Rick,
This is a great primer for my team as we start planning some migrations / testing into AWS. Great article, easy to follow and appreciate the additional links and references to AMS.